SERVICES
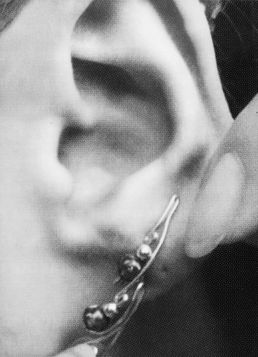
HOW TO PUT ON EARVINES
Step 1: Utilizing a delicate and precise touch, grasp the apex of your left ear just above the piercing point with your left thumb and index finger. With your right hand, insert the left Earvine® through the front of the ear in the manner of a conventional earring.
Step 2: Once the Earvine® has been securely inserted, carefully and intentionally slide it up the ear, using the support of your thumb and index finger for guidance.
Step 3: Once the Earvine® has been fully inserted, make any necessary adjustments to the wire located at the posterior of the ear, ensuring that it is positioned as far back as possible, and adjust the Earvine® at the front as required for optimal appearance and stability.

AFTER SALE SERVICe
Recognizing the fact that procuring jewelry represents a significant investment, it is imperative that our valued patrons possess an unshakable confidence in their choices. To this end, we have implemented a plethora of services designed to guarantee complete satisfaction. Additionally, for any patrons who may find themselves less than completely satisfied with their purchase, we have instituted a 14-day return policy. Rest assured, we are resolute in our commitment to providing the most exceptional service possible and are unwaveringly dedicated to the quality of our jewelry.
CARE INSTRUCTIONS
In order to preserve its shimmer and radiance, it is advisable to abstain from subjecting your jewelry to adverse chemical compounds, intense thermal fluctuations, and an excessive amount of humidity. When not being utilized, it is recommended to safely store your jewelry in an environment that is free from excessive moisture and maintains a moderate temperature, with the preferred method being a soft cloth pouch or a specially designed jewelry box. To cleanse your jewelry and remove any tarnish or dirt, it is advised to employ a delicate wiping motion utilizing a microfiber cloth, or to utilize a solution specifically formulated for the purpose of jewelry maintenance


